
When you are interested in using solar power in your home, RV, boat, or off-grid cabin, then one of the most indispensable things to know is how to wire a solar panel to a battery. This guide will take you through this process in a simple manner that is clear and easy to understand involving easily obtainable elements.
Why Connect a Solar Panel to a Battery?
Solar panels produce electricity only during sunshine. This energy is stored in batteries, so you can use it at some other time even during the night or when it is cloudy.
You can use a solar panel to:
- Store power for later use
- Run devices off-grid
- Cut down on your electric bill
- Be energized in times of crisis
Step 1: Understand the Basic Solar Wiring Diagram
The following is a basic outline of the way your solar power system will be wired:
Solar Panel → Charge Controller → Battery
Why use a charge controller? A solar panel connected directly to a battery may either be overcharged or damaged by the battery. The charge controller guarantees the battery is supplied with the right voltage and current.
Step 2: Choose the Right Solar Panel and Battery
Match Voltage:
The majority of minor systems operate on 12V panels and 12 V batteries. Be sure that all parts are compatible should you be using a 24V system.
Solar Panel Size:
A 100W-200W solar panel will normally suffice to charge a 12 V battery in light application (lights, charging phones, etc.).
Battery Capacity:
The size of your battery will depend on the amount of energy you will be storing which is measured in amps per hour (Ah).
For Example:
The battery (capacity 100Ah) and the 12V give 1200 watt-hours (Wh) of energy storage.
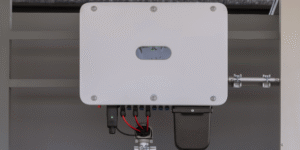
Step 3: Install the Charge Controller
Place your charge controller in a dry and well-ventilated area close to the battery.
Connect the Battery First:
Most charge controllers have the battery connected in front of the panel. This enables the controller to automatically sense system voltage.
Use the correct terminals:
- Positive (marked with a plus or red color)
- Negative (marked as “-” or black)
- Check polarity with a multimeter
Step 4: Connect the Solar Panel to the Charge Controller
Safety First:
- Wipe the solar panel with a towel before touching as this will stop electricity flow or leave it in the shadow.
- Connect with MC4 (typical of solar wiring) or cut the wires and use these to connect with the charge controller PV (solar) terminals.
- Viewed through panel- PV + on controller.
- Theme: The current flowing through the PV- on controller is negative.
After being connected, uncover the panel; the controller should begin showing a charging status.
Step 5: Connect the Charge Controller to the Battery
Install the deep cycle battery to the battery terminals of the controller with wires of the correct size (usually 10 or 12 AWG):
- Battery + on controller – Positive battery terminal
- Battery- on controller – Battery negative
Note: Normally a fuse or circuit breaker should be placed on the positive wire near the battery to ensure that a short circuit is prevented.
Step 6: Test the System
Once all the connections have been established:
- Measure the voltage on the battery prior to and subsequent to connection with the circuit on a multimeter.
- Keep watch on the charge controller display in charge status, battery voltage, and power input.
- Make sure that the battery is being charged by the solar panel.
Step 7: Everything must be secured
Once everything is working:
- Zip-tie or cable clip
- Insert the battery in an open, fastened box
- Install the solar panel facing south (in the U.S.) at the optimum tilt to the place
- Name all the connections where feasible
Common Mistakes to Avoid
Connecting the Panel Directly to the Battery
This may overpower or break your battery. A charge controller should be used at all times.
Using Mismatched Voltages
When the voltages of your solar panel and battery are not matched, then your system will not charge effectively, or might be destroyed.
Skipping the Fuse or Circuit Breaker
This is a fire hazard. Overcurrent protection must always be provided.
Poor Wire Sizing
Overheating of wires that are too thin may occur.
Maintenance Tips
- Always wash your solar panels after a few months to ensure that they are functioning at their full capacity.
- Check all wires and connections on a regular basis for corrosion or wear.
- Check the charge controller or multimeter voltage on battery.
Expanding Your System
After getting one of the panels connected to a battery, you may wish to do more.
- Increase the number of panels in series or in parallel.
- AC appliances can be powered using a solar inverter.
- Add a battery monitor and track it in greater detail.
- Go offline or add a supplement to your household power.
All you need to do is to upgrade your charge controller and wiring to support the extra load.